Learn how to diagnose a broken cooker with simple DIY checks, safety tips, common fault guides, and when to call a professional.
Stove Not Working – Causes, Diagnosis & Repair Guide
When your Stove Not Working, means the cooking appliance fails to ignite, heat, or stay powered. Also known as stove malfunction, it can stem from electrical, gas, or mechanical issues. An electric stove, uses heating elements and thermostats to generate heat may suffer from blown fuses or a broken element, while a gas stove, relies on burners and igniters to produce flame can be blocked or have a faulty ignitor. Professional appliance repair, service that diagnoses and fixes household devices often starts with simple checks before moving to component replacement.
Typical Reasons Behind a Non‑Functional Stove
Stove not working encompasses three broad fault families: power supply problems, fuel delivery glitches, and control system failures. For an electric model, a tripped breaker, a burnt heating coil, or a malfunctioning thermostat can stop heat production. Gas models frequently suffer from clogged burner jets, a weak spark igniter, or an empty gas tank. Control boards, especially on newer hybrid stoves, may develop cracked solder joints that interrupt communication between the user interface and the heating elements.
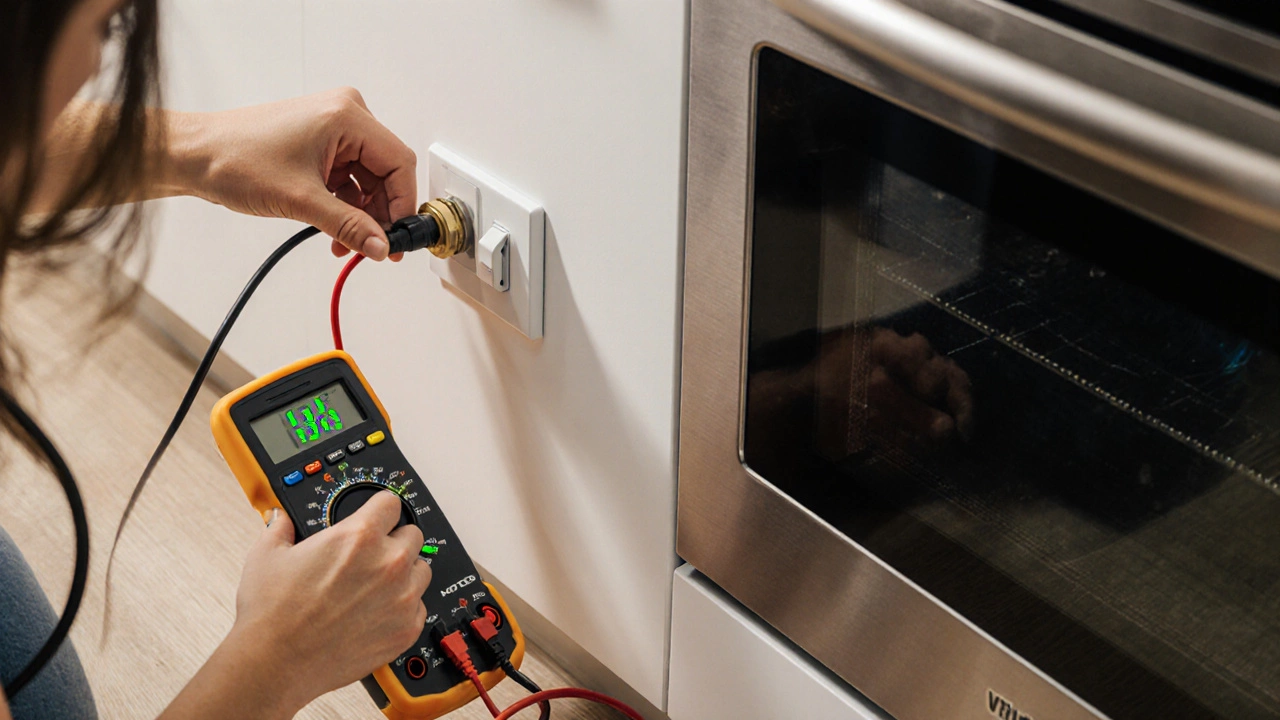
Diagnosing a stove requires basic tools such as a multimeter, screwdriver set, and safety gloves. First, verify that the unit receives power or gas—check the breaker, plug, or supply valve. Next, test continuity on heating elements or igniters with a multimeter; a zero reading indicates a broken component. Finally, inspect wiring connectors for corrosion or loose pins. These steps usually reveal the culprit without opening the entire appliance.
Safety should never be an afterthought. Always turn off the power at the breaker or shut off the gas before poking around inside the stove. If you smell gas, vent the area immediately and avoid creating sparks. Wearing insulated gloves protects against accidental electric shocks, especially when dealing with high‑voltage components. Proper appliance repair improves kitchen safety and extends the lifespan of your cooking gear.
Common quick fixes can save a call to the technician. A blown fuse on an electric stove is often replaceable with a matching rating; a few minutes and the burner works again. For gas stoves, cleaning the burner ports with a thin wire or soft brush removes food debris that blocks flame. Resetting the igniter by turning the stove off for five minutes can sometimes clear a stuck sensor.
When the problem persists, take note of specific symptoms. Does the stove produce a clicking sound without lighting? That points to an igniter or spark module issue. Is the display blank or flashing error codes? Modern stoves store diagnostic codes that can be looked up in the user manual. These clues guide whether you can DIY the repair or need a certified technician.
Our collection of articles below covers related scenarios you might encounter while troubleshooting. If your oven won’t heat, the “Oven Not Heating? Common Causes and No‑Heat Fixes” guide walks you through element and thermostat checks. For gas‑related hiccups, the “Electric Oven Not Working? Top Reasons and Quick Fixes Explained” post highlights fuse and sensor failures that often mirror stove problems. The “DIY Fridge Repair” piece showcases a step‑by‑step approach you can reuse for other appliances, while the “Why Kitchen Extractor Fans Stop Working” article teaches you how to test motors and wiring—skills that translate well to stove diagnostics.
Beyond the basics, advanced users may consider component upgrades. Swapping a standard heating coil for a high‑efficiency version can reduce energy use on electric stoves. Installing a more reliable piezo igniter on a gas model reduces the chance of intermittent sparks. However, these upgrades should only be attempted after you’re comfortable with the appliance’s internal layout and have the right replacement parts.
Remember, a well‑maintained stove not only cooks your meals faster but also prevents costly fire hazards. Regularly clean burner caps, wipe down the control panel, and schedule a professional inspection every few years. These habits catch early wear before it becomes a full‑blown failure.
Below you’ll find a curated list of posts that dive deeper into each of these topics. Whether you’re looking for step‑by‑step DIY guides, cost‑benefit analyses for repairing older units, or safety checklists, the articles are organized to help you move from diagnosis to a lasting fix.
Ready to tackle the issue? Explore the detailed guides ahead and discover the exact steps to bring your stove back to life.