Cooker Diagnostic Tool
Problem Diagnosis
Select symptoms to identify potential issues. Always follow safety guidelines from the article before attempting repairs.
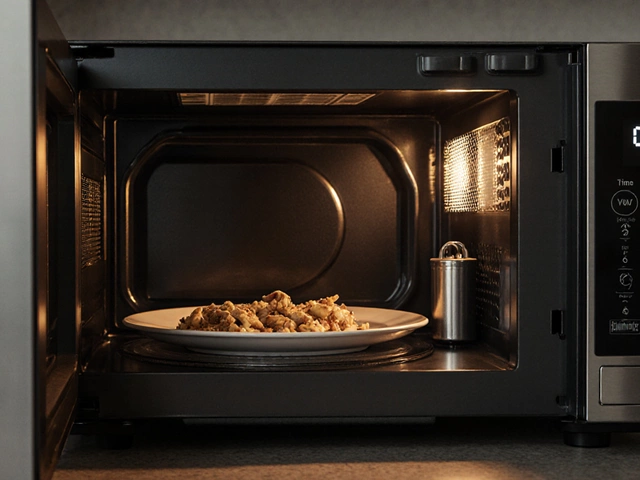
When your cooker refuses to heat, clicks weirdly, or simply won’t turn on, the first thought is usually “it’s broken”. Before you start hunting for a pricey service call, you can run a few quick checks that reveal what’s really happening. This guide walks you through the most common signs, safe DIY diagnostics, and exactly when you should hand the job over to a professional.
Quick Takeaways
- Verify power and gas supply before digging deeper.
- Check the heating element a metal coil that converts electricity into heat in electric cookers with a multimeter.
- For gas cookers, the igniter the spark device that lights the gas flame is a frequent culprit.
- Always disconnect the appliance or shut off the gas before any inspection.
- Call a service technician a licensed professional who can safely repair appliances if you encounter burnt components, gas smells, or electrical faults you can’t fix.
1. Start with the Obvious - Power and Gas Checks
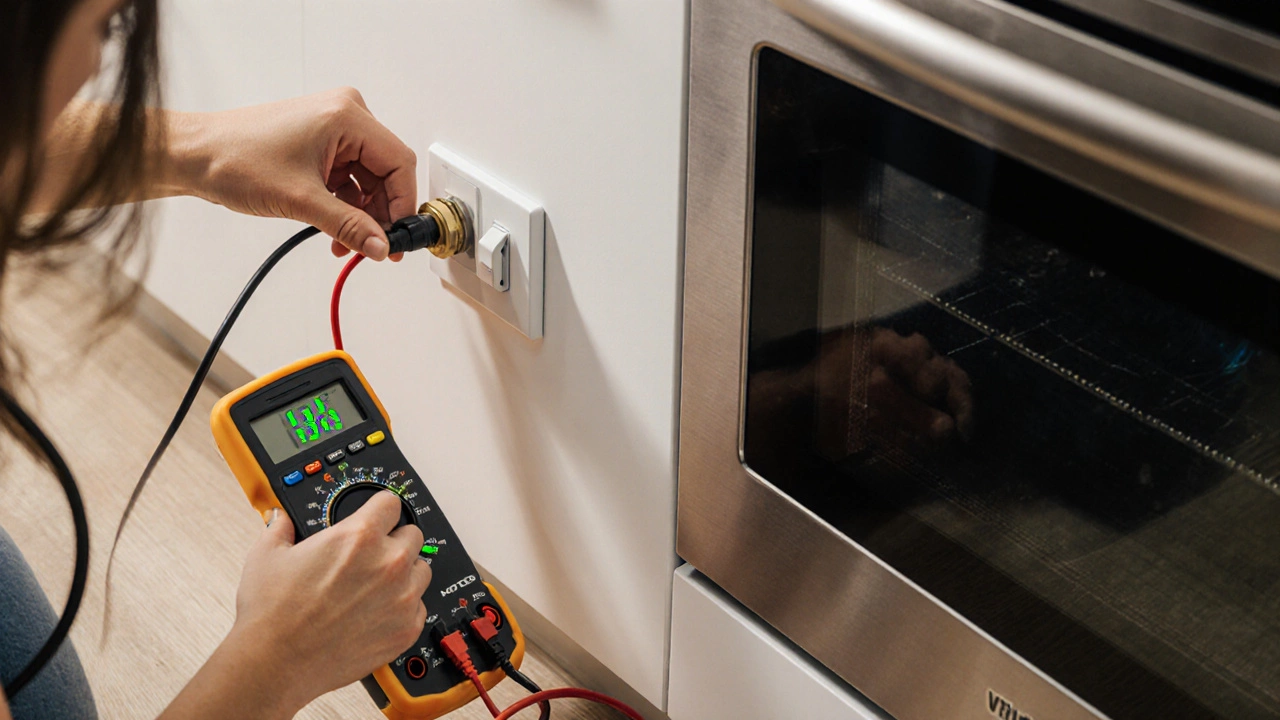
Most cooker failures boil down to a simple supply issue. If the control panel is dead, the first thing to do is make sure the appliance is actually receiving power.
- Plug the cooker into a known‑working outlet. If it’s a built‑in unit, test the wall socket with a lamp or a voltage tester.
- Look for a tripped circuit breaker or a blown fuse in your home’s main panel. Reset the breaker and give the cooker another try.
For gas models, locate the shut‑off valve behind the unit. Turn the knob to the fully open position (usually parallel to the gas line) and listen for a faint hissing sound, which indicates gas flow. Never smell for gas with an open flame-use a carbon‑monoxide detector or the scented “pepper” test if you suspect a leak.
2. Safety First - Disconnect Before You Inspect
Even if the cooker seems dead, there could still be live electricity in the wiring. Unplug the unit or switch off the dedicated circuit at the breaker. For gas cookers, turn the main gas supply valve off before opening any panels. Wearing insulated gloves and safety glasses is a smart habit.
3. Common Electrical Cooker Faults
Electric cookers rely on a few key components that wear out over time. Understanding each part helps you pinpoint the problem.
- Heating element a metal coil that converts electricity into heat in electric cookers: If it looks blistered, broken, or has visible hotspots, it’s probably faulty.
- Thermostat the temperature‑sensing device that tells the element when to turn on or off: A stuck thermostat can keep the element from heating even when you set a high temperature.
- Power cord the insulated cable that brings electricity from the wall to the cooker: Look for cuts, scorch marks, or loose connections.
- Safety switch a built‑in circuit breaker that trips if the cooker overheats: If the cooker won’t stay on, the switch may have tripped and needs resetting or replacement.
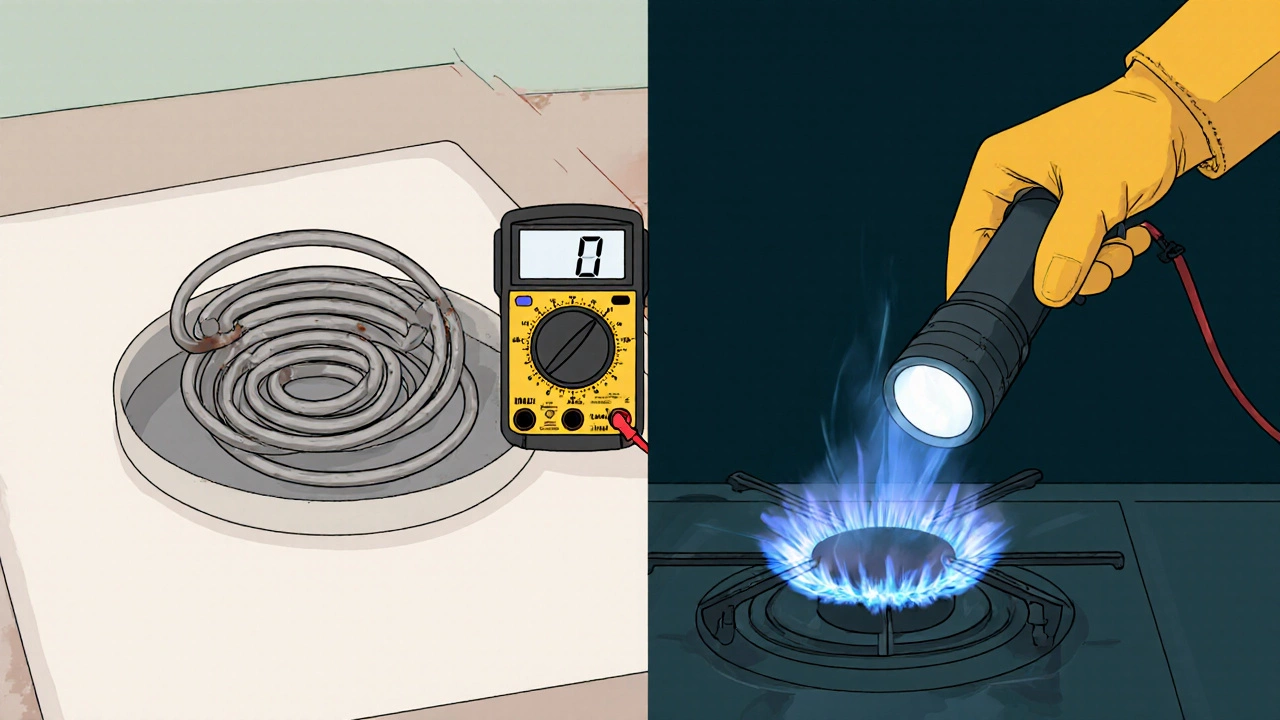
Testing these parts usually requires a multimeter. Set the meter to the ohms (Ω) setting, touch the probes to the element’s terminals, and compare the reading to the manufacturer’s spec (often around 10‑30Ω). A reading of “OL” (open loop) means the element is broken.
4. Common Gas Cooker Faults
Gas cookers have a slightly different set of failure points.
- Igniter the spark device that lights the gas flame: A weak or dead igniter will produce a faint click but no spark. You can often hear the click without seeing a spark.
- Gas valve the electronic valve that opens when you turn the knob and allows gas to flow: If the valve is stuck, the knob will turn but no gas reaches the burners.
- Thermocouple a safety device that shuts off gas if the flame goes out: A cracked thermocouple may cut the gas supply as soon as you try to light the burner.
To test the igniter, remove the burner cap, locate the spark electrode, and observe it with a flashlight while turning the knob. A bright blue spark indicates a healthy igniter. If the spark is missing, the igniter usually needs replacement.
5. Simple Diagnostic Tests You Can Do at Home
Armed with a multimeter and a few basic tools, you can verify the health of most internal parts.
- Continuity test for heating elements: Unplug the cooker, disconnect the element wires, then place the multimeter probes on the element’s ends. A steady resistance value means continuity; “OL” means a break.
- Thermostat check: With the cooker still offline, disconnect the thermostat leads and measure resistance. Compare the reading at room temperature to the spec sheet - a significant deviation suggests a bad thermostat.
- Igniter voltage check (gas models): Turn the gas knob to “high” and use a multimeter set to AC volts across the igniter leads. You should see around 3,500V for a spark‑ignition system. No voltage means a faulty igniter circuit.
- Oven temperature validation: Place an oven‑proof thermometer inside a pre‑heated oven set to 350°F (177°C). If the thermometer reads far below the set temperature, the temperature sensor or control board may be at fault.
Document each reading. If multiple components fail the same test, the problem could lie in the wiring harness or the main control board, which generally calls for a professional.
6. Knowing When to Call a Professional
Some issues are safer and more cost‑effective to leave to experts:
- Burnt or melted wiring, especially near the power cord.
- Persistent gas odors after you’ve shut the supply off - this could indicate a leak in the gas line.
- Control board failures (digital displays that stay blank or show error codes you can’t decode).
- Repeated tripping of the safety switch after you’ve replaced the heating element.
In these cases, contact a service technician a licensed professional who can safely repair appliances. Make sure they are certified for gas work if you have a gas cooker.

7. Preventive Maintenance to Keep Your Cooker Happy
Regular care can extend the life of your cooker and prevent many of the issues above.
- Wipe spills immediately - sugar or grease can harden and damage the heating element.
- Inspect the burner caps and igniter tips monthly; clean them with a soft brush if they’re corroded.
- Run a self‑cleaning cycle (if available) no more than once every three months to avoid overheating the oven’s interior.
- Check the power cord for fraying annually. Replace it at the first sign of wear.
- For gas models, schedule a professional inspection of the gas valve and connections every 2‑3 years.
Following these habits reduces the chance of a sudden breakdown and keeps your cooking experience smooth.
Comparison Table - Common Problems vs. DIY Fixes
| Problem | Symptom | Likely Cause | DIY Fix? |
|---|---|---|---|
| Element not heating | Burner stays cold | Burnt heating element | Yes - replace element |
| No spark on gas burner | Clicking sound, no flame | Faulty igniter | Yes - replace igniter |
| Oven stays at low temp | Thermometer reads 50°F low | Bad thermostat or sensor | Often - replace thermostat |
| Control panel dead | No lights, unresponsive knobs | Tripped breaker or faulty power cord | Yes - reset breaker or replace cord |
| Gas smell after turning on | Odor of natural gas | Leaking valve or cracked hose | No - call technician |
Frequently Asked Questions
Why won’t my electric stove heat up at all?
The most common reason is a failed heating element or a tripped circuit breaker. First verify the outlet works, then test the element for continuity with a multimeter. If the element shows open circuit, replace it.
How can I tell if my gas igniter is broken?
When you turn the knob, you should hear a faint click and see a bright blue spark at the igniter tip. If the click is there but there’s no spark, the igniter is likely dead and needs replacement.
Is it safe to replace a heating element myself?
Yes, as long as the cooker is unplugged and you follow the manufacturer’s wiring diagram. Make sure the new element matches the voltage and wattage specs of the original.
What should I do if I smell gas after trying to light a burner?
Turn off the main gas supply immediately, open windows, and avoid any flames or sparks. Call a licensed technician or your gas provider to inspect the valve and connections.
Why does my oven temperature fluctuate wildly?
A drifting temperature sensor or a failing thermostat can cause the oven to overshoot or undershoot set points. Replace the faulty sensor or thermostat after confirming the issue with an oven thermometer.
Next Steps
If you’ve walked through the checks above and identified a specific faulty component, order the correct replacement part (match model number and voltage). For any gas‑related repairs you’re unsure about, schedule a service visit before using the cooker again. Regular cleaning and an annual visual inspection will keep most problems from resurfacing.