Learn how to safely replace a kitchen extractor fan motor with step‑by‑step instructions, tools list, wiring tips, motor type comparison, and troubleshooting FAQs.
Replace Extractor Fan Motor – What You Need to Know
When tackling Extractor Fan Motor Replacement, the process of removing a faulty motor from a kitchen or bathroom fan and installing a new one. Also known as fan motor swap, it brings back proper airflow and stops moisture from ruining walls and cabinets.
Most fans stop because the Electric Motor, the component that drives the fan blades to move air overheats or its bearings wear out. High humidity, continuous use, and dust build‑up accelerate the wear. If you’ve noticed reduced suction or a humming noise, the motor is likely the culprit. That's why replace extractor fan motor is a common DIY project for homeowners who want to avoid pricey service calls.
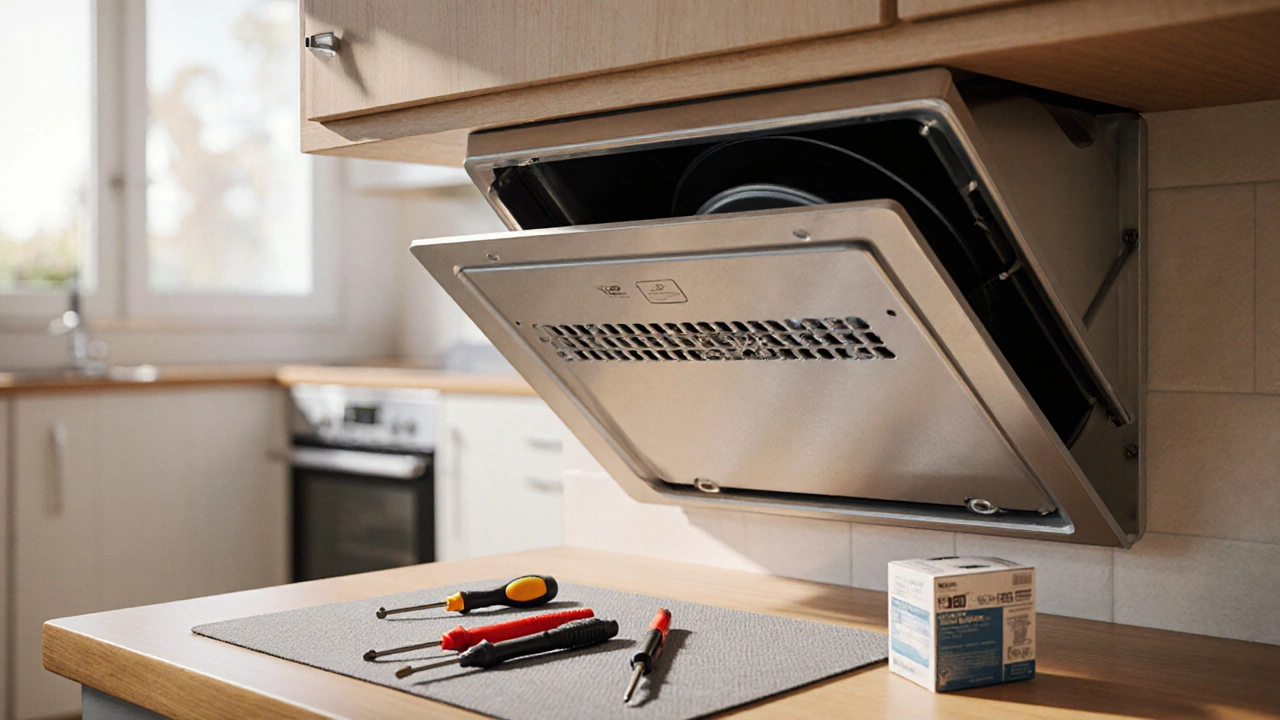
The fan itself is a key part of the Ventilation System, the network of ducts and fans that expels stale air from a room. When the motor fails, the whole system stalls, leading to mold growth and persistent odors. Understanding that relationship helps you see why a quick motor swap can protect the rest of the house. Before you start, gather a basic DIY tool kit: screwdriver set, pliers, wire stripper, and a voltage tester. These tools let you work safely and keep the job under control.
First, turn off power at the circuit breaker—never rely on the switch alone. Use the voltage tester to double‑check that the wires are dead. Next, remove the fan’s outer grille; most models snap or screw off in a few seconds. Once the housing is open, you’ll see the motor mounted on a metal bracket. Disconnect the wiring harness by pressing the release tab, then unscrew the motor from its bracket. Keep the screws in a small container so they don’t roll away.
Now compare the old motor with the replacement. Ensure the new unit matches the original’s voltage (usually 120 V or 230 V), horsepower, and mounting hole pattern. Slip the new motor onto the bracket, re‑attach the wiring harness, and tighten the screws securely. If the fan uses a pull‑chain or speed switch, make sure those connections line up exactly as before. Once everything is back in place, replace the grille, restore power, and run the fan for a few minutes. Listen for smooth operation and feel for steady airflow—those signs confirm a successful swap.
Even a careful install can hit snags. Common issues include loose wire connections, which cause the motor to trip the breaker, or a misaligned fan blade that creates wobble and noise. If the fan still doesn’t spin, double‑check the wiring polarity and look for any burned marks on the motor terminals. In cases where the motor housing is sealed or the wiring is hidden behind a drywall panel, it’s wiser to call a professional technician. They have the tools to cut into walls safely and can test the fan’s capacitor, another part that often fails alongside the motor.
Having a clear picture of the whole process makes the job less intimidating and helps you avoid unnecessary repairs. Below you’ll find a curated list of articles that dive deeper into each step, from diagnosing fan problems to choosing the right replacement motor. Whether you’re a seasoned DIYer or just getting started, the collection gives you practical tips, safety checklists, and troubleshooting tricks to keep your home’s ventilation humming smoothly.