Kitchen Extractor Fan Motor Selector
Motor Type Comparison
| Type | Voltage | Wattage | Lifespan | Noise Level (dB) |
|---|---|---|---|---|
| AC Shaded-Pole | 120 V / 230 V | 30-45 W | 5-7 years | 55-60 |
| DC Brushless | 12-24 V DC | 20-35 W | 8-10 years | 48-52 |
| Universal (AC/DC) | 120-240 V | 35-55 W | 6-8 years | 58-63 |
Installation Steps Overview
Got a sluggish or silent kitchen extractor fan? Most of the time the problem is the motor. Swapping a motor isn’t rocket science - just a handful of tools, a bit of caution, and the right replacement part. Follow this guide and you’ll have fresh airflow in no time.
What You Need Before You Start
- Extractor fan - the whole unit mounted under your cabinet, typically 120‑150mm wide.
- Motor - the electric component that spins the fan blade. Know the model number (e.g.,AF‑M‑1200) and voltage (120V AC or 230V AC).
- Circuit breaker - the safety switch in your home’s electrical panel. Turn it off to avoid shock.
- Screwdriver - typically a Phillips #2 and a flat‑head 6mm.
- Wiring harness - the set of wires that connect the motor to the fan’s power source.
- Fan housing - the metal or plastic shell that holds the motor and blade together.
- Switch - the wall or pull‑chain switch that you use to turn the fan on and off.
- Voltage tester - a non‑contact tester to double‑check that the circuit is dead.
Step 1: Safety First - Cut the Power
Locate your home’s circuit breaker and flip the switch for the kitchen circuit. Even if the extractor looks unplugged, the wiring inside the housing can still be live. Use a voltage tester on the motor’s terminals; the meter should read zero.
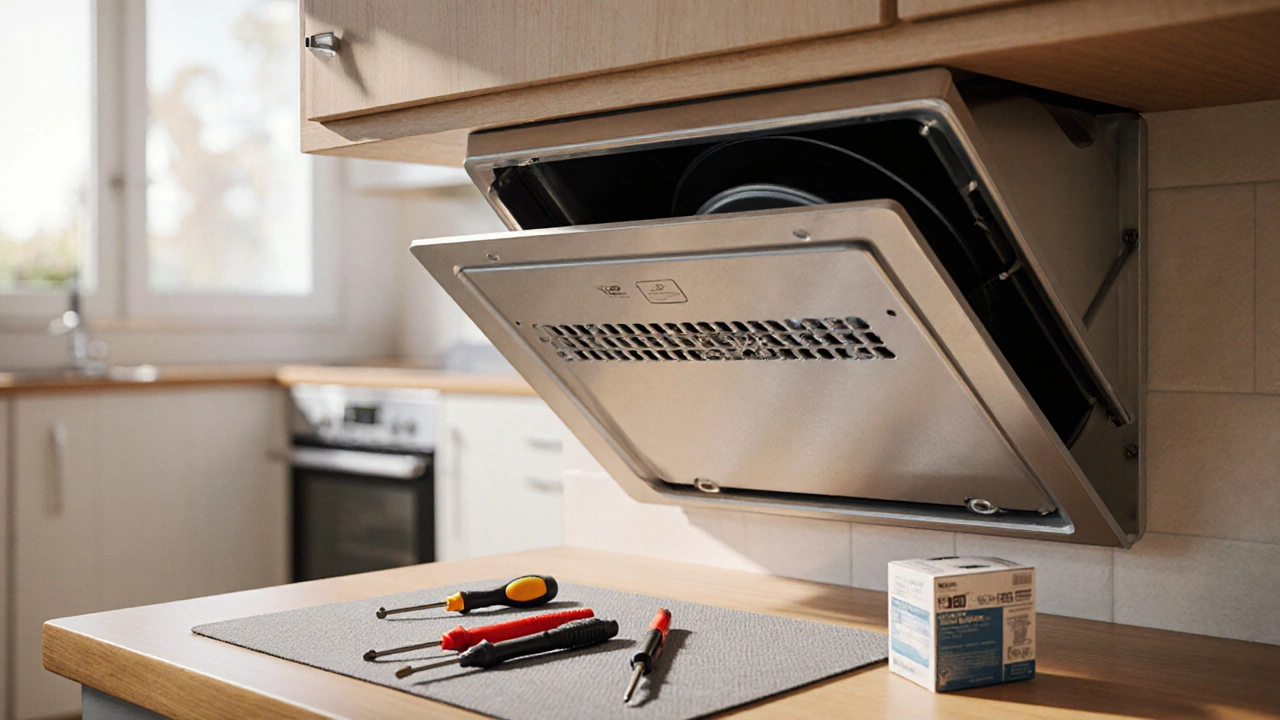
Step 2: Access the Motor
Most under‑cabinet fans have a removable front cover. Unscrew the four or six screws holding the fan housing in place. Gently pull the housing forward - you should see the motor cradled by a metal bracket.
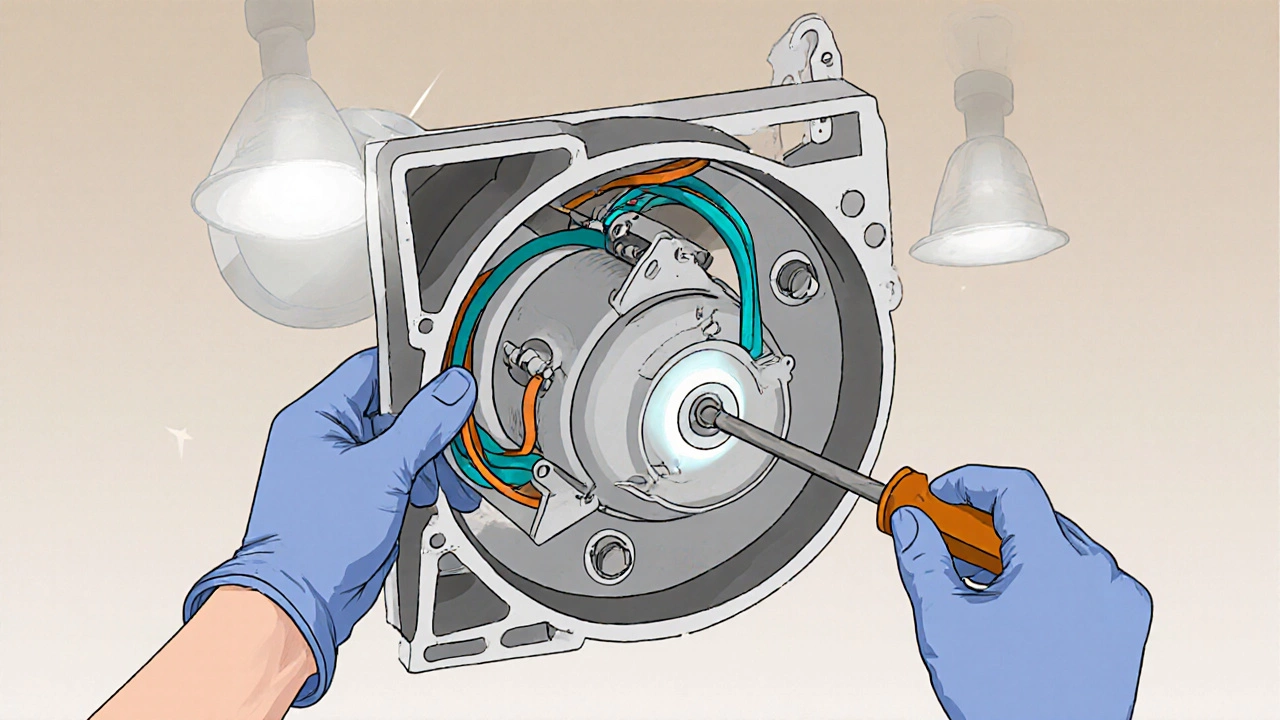
Step 3: Document the Wiring
Before you unplug anything, take a clear photo of the existing connections. Note the colour coding (typically black=live, white=neutral, green=ground). If the wires are attached with push‑in connectors, press the release tabs; for screw terminals, loosen the screws just enough to free the wires.
Step 4: Remove the Old Motor
Most motors are secured with two mounting screws. Using the Phillips #2 screwdriver, take out these screws. Carefully slide the motor out of the bracket - you may need to wiggle it a bit if the bearings are stuck.
Step 5: Prep the New Motor
Unbox the replacement, check that the shaft size matches the fan blade (usually 5mm). If the new motor comes with a pre‑wired harness, compare it to the photo you took earlier. If not, you’ll need to attach the existing wiring harness. Strip about 5mm of insulation from each wire, twist onto the corresponding terminal, and tighten securely.
Step 6: Install the New Motor
Slide the new motor into the bracket, align the mounting holes, and secure with the two screws you removed earlier. Re‑attach the wiring harness exactly as it was - colour‑for‑colour.
Step 7: Re‑assemble the Fan Housing
Push the housing back into the cabinet, re‑screw the front cover, and ensure there are no loose screws that could rattle when the fan runs.
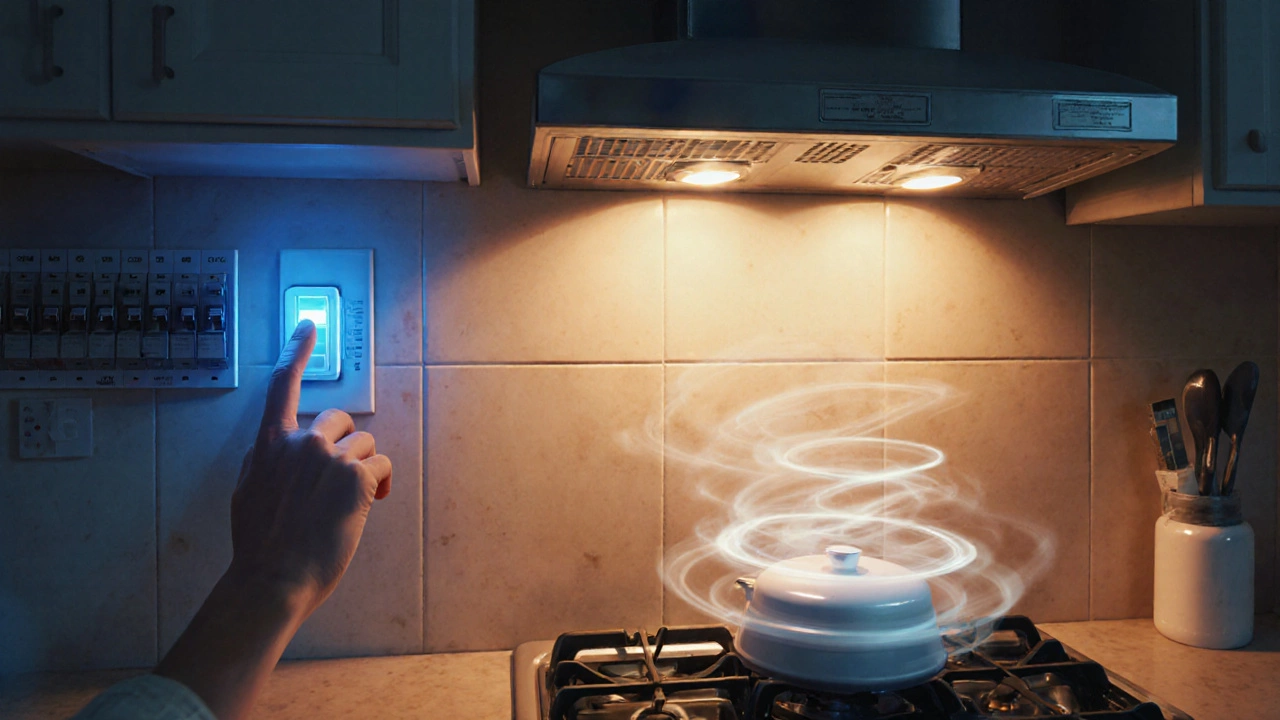
Step 8: Test the Installation
Flip the circuit breaker back on. Turn on the switch and listen for the motor whirring. If it runs smoothly, give it a few minutes to verify that the airflow reaches the expected level. If the fan stalls or makes grinding noises, double‑check the shaft alignment and that the motor is firmly mounted.
Common Motor Types - Quick Comparison
| Type | Voltage | Wattage | Typical Lifespan | Noise Level (dB) |
|---|---|---|---|---|
| AC Shaded‑Pole | 120V (North America) / 230V (EU) | 30‑45W | 5‑7years | 55‑60 |
| DC Brushless | 12‑24V DC | 20‑35W | 8‑10years | 48‑52 |
| Universal (AC/DC) | 120‑240V | 35‑55W | 6‑8years | 58‑63 |
Tips to Avoid Common Pitfalls
- Don’t skip the photo. Wiring mistakes are the top cause of DIY failures.
- Use a torque‑controlled screwdriver for the motor mounting screws; overtightening can warp the bracket.
- If the fan blade is stuck, apply a small amount of penetrating oil to the shaft before removal.
- Check the fan’s airflow rating (CFM) after replacement - a weak motor can reduce cooking‑smoke extraction.
- Keep the old motor as a spare; you may need it for future parts or to confirm part numbers.
When to Call a Professional
If you discover cracked wiring, burnt insulation, or the motor still won’t spin after a correct install, it’s safer to bring in a licensed electrician or an appliance‑repair specialist. Electrical codes in Canada (CSA) require a qualified person for any work that involves altering the building’s wiring.
Summary Checklist
- Turn off the circuit breaker and verify no voltage.
- Remove the front cover and access the fan housing.
- Document wiring, then disconnect the wiring harness.
- Unscrew and pull out the old motor.
- Prepare and attach the new motor, ensuring correct shaft alignment.
- Re‑assemble the housing, restore power, and test operation.
Frequently Asked Questions
How do I know which motor size fits my extractor fan?
Check the fan’s service manual or the label inside the housing - it lists shaft diameter (usually 5mm), voltage, and mounting screw pattern. If the label is missing, measure the old motor’s shaft and note the screw spacing.
Can I use a universal motor as a replacement?
Yes, as long as the voltage matches your home supply, the shaft size fits, and the motor’s CFM rating meets or exceeds the original. Universal motors are a good fallback when the exact OEM part isn’t stocked.
What safety gear should I wear?
Wear insulated gloves, safety glasses, and a dust mask if you’re removing built‑up grease. If the fan is above a stove, the interior can be greasy and hot.
My fan runs but the airflow feels weak. Is the motor the problem?
Not necessarily. Check the fan blade for grease buildup, inspect the duct for blockages, and ensure the motor isn’t slipping on the shaft. Cleaning the blade and duct often restores flow without a motor swap.
How long should a new extractor fan motor last?
With regular cleaning, a quality motor should run 7‑10years in a typical Canadian kitchen. Brushless DC models can stretch beyond 12years.