Learn how to safely replace a kitchen extractor fan motor with step‑by‑step instructions, tools list, wiring tips, motor type comparison, and troubleshooting FAQs.
Kitchen Extractor Fan Repair
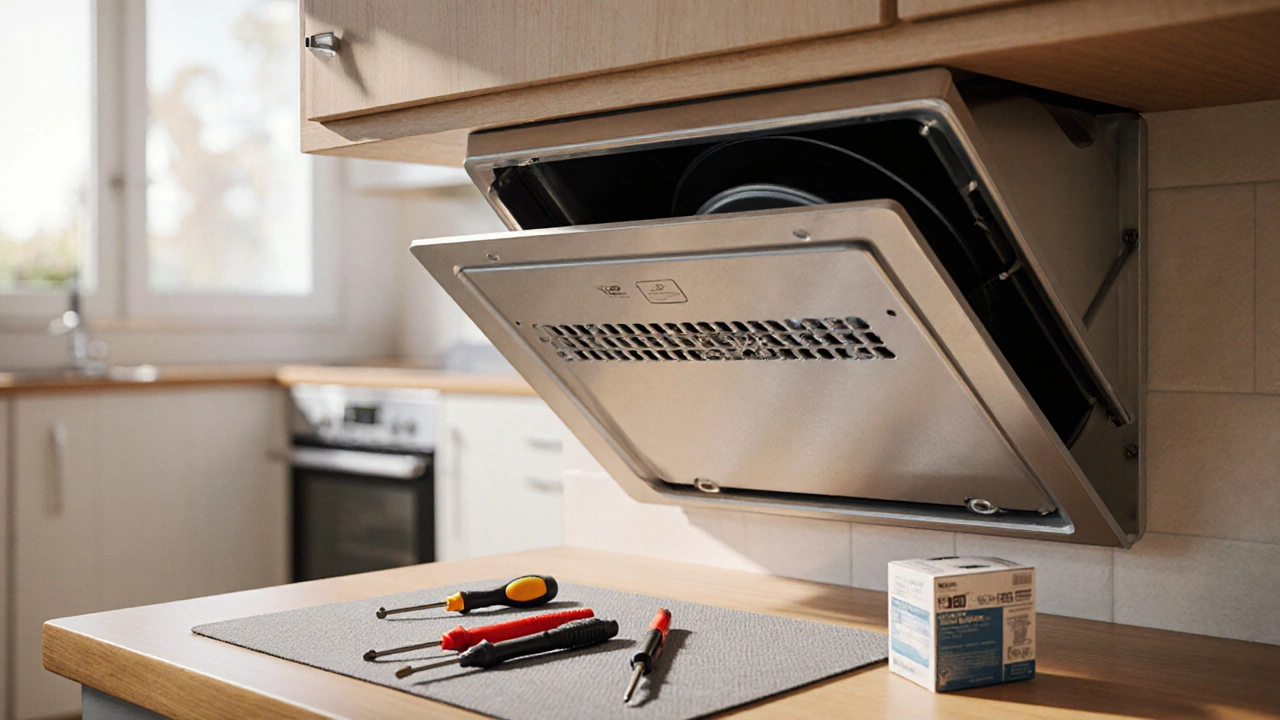
When dealing with Kitchen Extractor Fan Repair, the process of restoring a kitchen’s exhaust fan so it moves air, smoke, and smells out of the cooking area. Also known as Extractor Fan Fix, it usually means checking the extractor fan, the device that pulls steam and grease‑laden air away from the stove, making sure the ventilation, the network of ducts and vents that carries air outside is clear, and diagnosing any motor or wiring issues. Most homeowners start with a quick visual check, then move on to deeper tests if the fan stays silent.
The kitchen extractor fan repair journey often follows three simple steps: identify the symptom, isolate the faulty part, and apply the right fix. A humming fan that won’t spin points to a motor problem; a rattling sound usually means loose blades or a damaged fan wheel. Dirty grease filters are a silent killer – they restrict airflow, force the motor to work harder, and eventually cause it to overheat. Cleaning the filter is a low‑effort win that restores performance in many cases.
Common Problems and Simple Fixes
One frequent issue is a motor that refuses to start. The typical cause is a burnt‑out motor windings or a tripped thermal overload. You can test the motor with a multimeter: if there’s no continuity, the motor needs replacement. Replacing a motor is a job that most DIYers can handle with a screwdriver, a new motor model, and a bit of patience. Just disconnect power, remove the old unit, and mount the new one, making sure the wiring matches the original color code.
Another common snag is a clogged duct. Over time, grease and dust travel the ductwork and settle inside, creating a blockage that reduces suction. To clear it, detach the duct from the fan housing, walk through it with a flexible brush, and vacuum any debris. If the duct is sealed with foil tape, replace the tape with metal‑clamp connections for a tighter seal.
Loose fan blades cause wobble and noise. Tightening the blade screws or replacing a cracked blade restores balance. When you remove the blade, check the central hub for cracks – a damaged hub can ruin even a new blade. Swap in a matching replacement part, and always secure the screws evenly to avoid future vibration.
Don’t overlook the electrical side. A faulty switch or a loose wire can make the fan act like it’s dead. Inspect the wall switch for signs of wear, and test the voltage at the fan’s power connector. If you find a broken wire, strip the ends, twist them together, and secure with a wire nut. Always turn off the circuit breaker before working on any wiring.
Regular maintenance prevents most of these headaches. Clean the grease filter monthly, wipe the fan housing, and inspect the duct for buildup every few months. A quick visual check can catch a loose screw or a cracked blade before it turns into a costly repair.
Below you’ll discover a curated selection of articles that dive deeper into diagnosing fan faults, step‑by‑step repair guides, and tips on when it’s best to call a professional. Whether you’re a DIY enthusiast or just looking for a quick fix, the resources ahead will help you get your kitchen air moving again.