DIY Oven Replacement Readiness Checker
Answer these critical safety and technical questions to see if you're equipped to handle this project or if a professional is required.
You're staring at a dead oven that refuses to heat, and you've already spent a small fortune on repairs that didn't stick. The big question is: can you actually swap out that heavy metal box yourself without burning your house down or spending a whole weekend fighting with a manual? The short answer is yes, but it depends entirely on your comfort level with high-voltage wiring and whether you have a buddy to help you lift the thing. Replacing an oven isn't rocket science, but it's a task where a single mistake with a wire can be dangerous.
Key Takeaways for DIY Oven Replacement
- Safety first: Always kill the power at the breaker box before touching any wires.
- Matching specs: Your new oven must match the amperage and voltage of your existing circuit.
- Physical help: Never try to slide an oven into a cabinet alone; you'll scratch your floors or strain your back.
- Tool check: You'll need a multimeter, a screwdriver set, and a voltage tester.
Understanding the Risks and Rewards
Before you grab your toolbox, let's be honest about what you're getting into. Electric Oven is a high-power kitchen appliance that uses electrical heating elements to cook food through convection or conduction. Because these machines pull a massive amount of current, they don't use a standard 120V plug like your toaster. Instead, they typically run on a 240V circuit. If you've never touched a Circuit Breaker, this might be the time to call a pro.
The reward for doing it yourself is obviously the money. A professional installation can cost anywhere from $150 to $300 just for the labor. If you're confident in your ability to follow a diagram and handle a heavy appliance, you can save that cash. But if the thought of touching a thick copper wire makes you sweat, the "reward" of saving $200 isn't worth the risk of an electrical fire.
Checking Your Electrical Setup
You can't just buy any oven and slide it in. You need to check your Electrical Panel to see what you're working with. Most modern electric ovens require a dedicated 30-amp or 40-amp circuit. If you're upgrading from an old 1990s model to a high-end convection oven with smart features, the new one might demand more power than your old wiring can provide.
Take a look at your Power Cord. Is it a 3-prong or 4-prong connection? Old homes often have 3-prong outlets (two hots and a neutral), while newer building codes require a 4-prong setup (two hots, a neutral, and a dedicated ground). If your new oven comes with a 4-prong cord but your wall has a 3-prong outlet, you have a choice: change the cord on the oven or hire an electrician to update the wall outlet. Never, ever use an adapter for a 240V appliance; it's a recipe for disaster.
The Step-by-Step Replacement Process
If you've decided to go for it, follow these steps precisely. Don't skip the safety checks just because you're in a hurry to get dinner started.
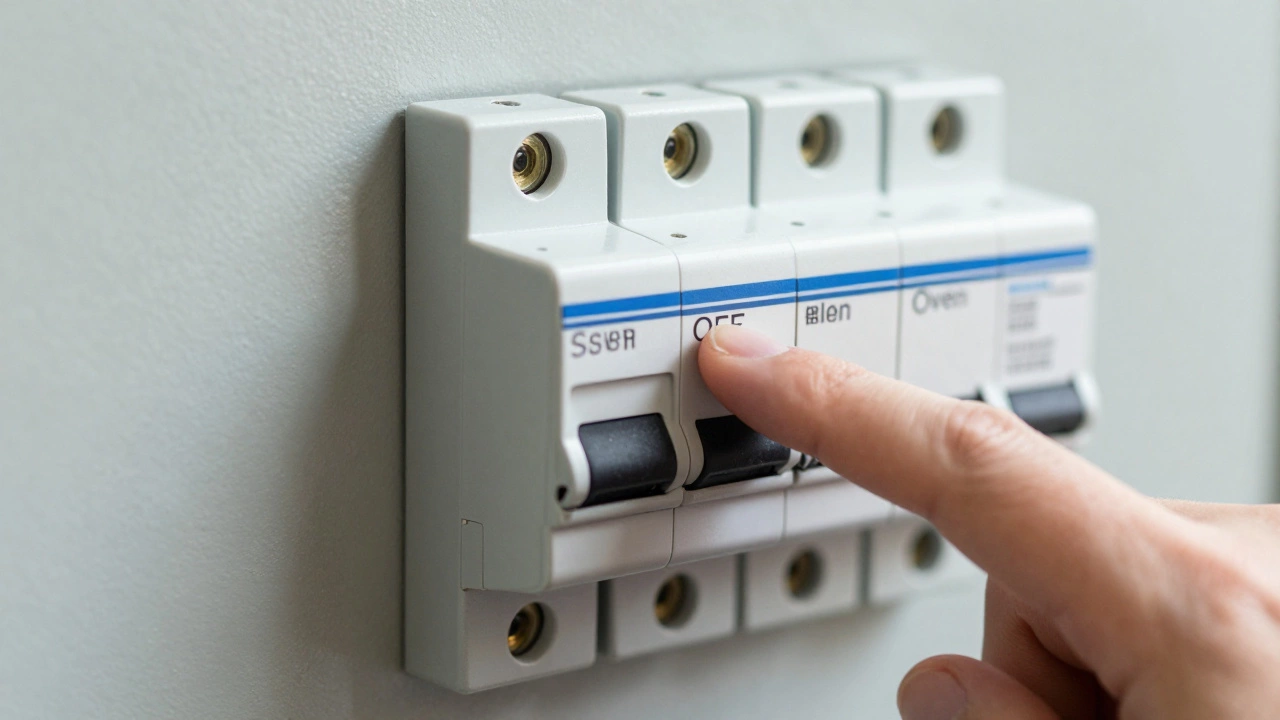
- Cut the Power: Go to your main breaker panel. Find the switch labeled "Oven" or "Range" and flip it to OFF. Use a Non-Contact Voltage Tester on the wires at the outlet to confirm there is absolutely no electricity flowing. Just flipping the switch isn't enough; always verify with a tool.
- Disconnect the Old Unit: Carefully pull the old oven away from the wall. Unscrew the strain relief clamp where the power cord enters the oven chassis. Disconnect the wires from the terminal block, making a note of which wire went where if you're keeping the old cord.
- Clean the Space: Now is the only time you'll have access to the sides of your cabinets and the floor beneath the oven. Vacuum up the years of crumbs and grease. It's a small detail, but it prevents pests and makes the new unit fit better.
- Prepare the New Oven: Most new ovens come with the power cord tucked inside the packaging-they aren't pre-installed. You'll need to knock out the entry plate on the back of the oven, thread the cord through, and secure it with the clamp.
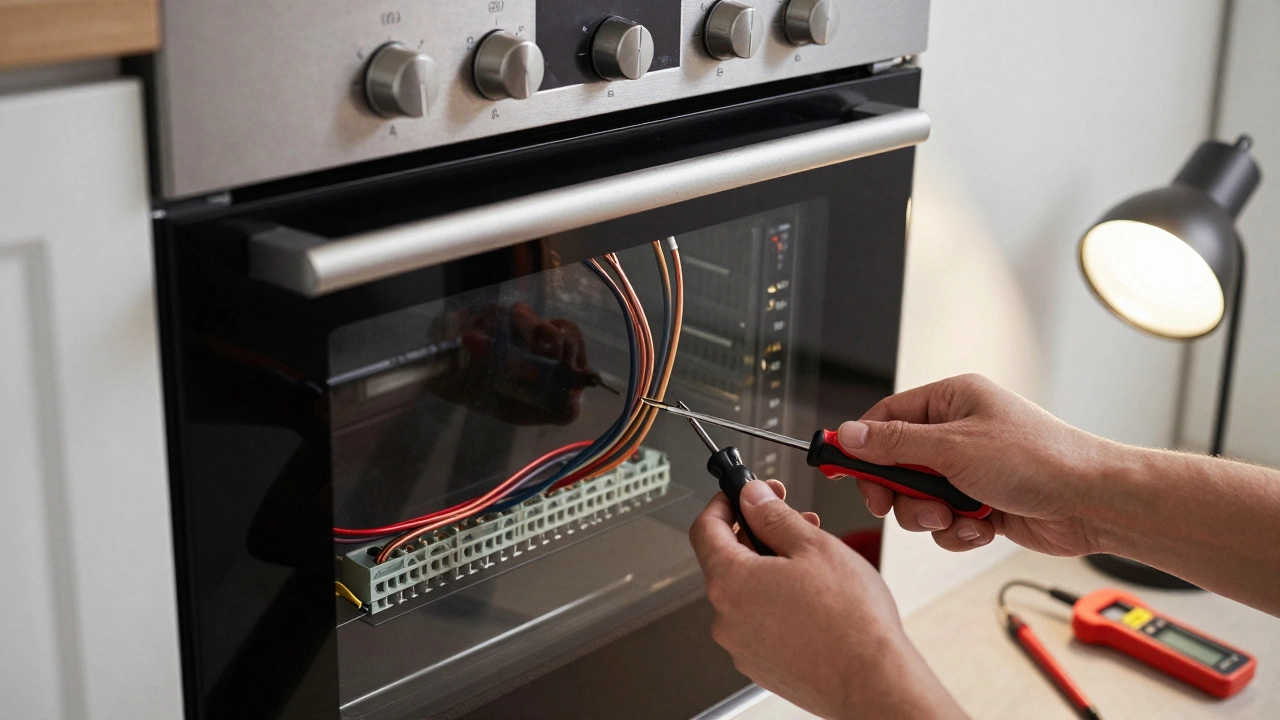
- Wire the Terminal Block: Connect the wires to the terminal block. Tighten the screws firmly. Loose connections create heat, and heat leads to melted wires. If you're unsure about the wiring, the installation manual for your specific brand will have a diagram.
- The Slide-In: With a partner, carefully slide the oven into the opening. Be mindful of the gas or water lines if you have a nearby dishwasher. Once it's in place, plug it into the wall outlet.
- The First Fire: Flip the breaker back on. Turn on the oven and set it to 350°F. Listen for the clicking of the elements and wait for the indicator light to turn off.
Essential Tools for the Job
Don't start this project with just a butter knife and a prayer. You need the right gear to ensure the connection is tight and the power is off.
| Tool | Purpose | Why it's Critical |
|---|---|---|
| Voltage Tester | Detects live electricity | Prevents accidental electrocution |
| Screwdriver Set | Tightening terminal screws | Prevents electrical arcing from loose wires |
| Multimeter | Measuring voltage and continuity | Confirms the outlet is delivering correct power |
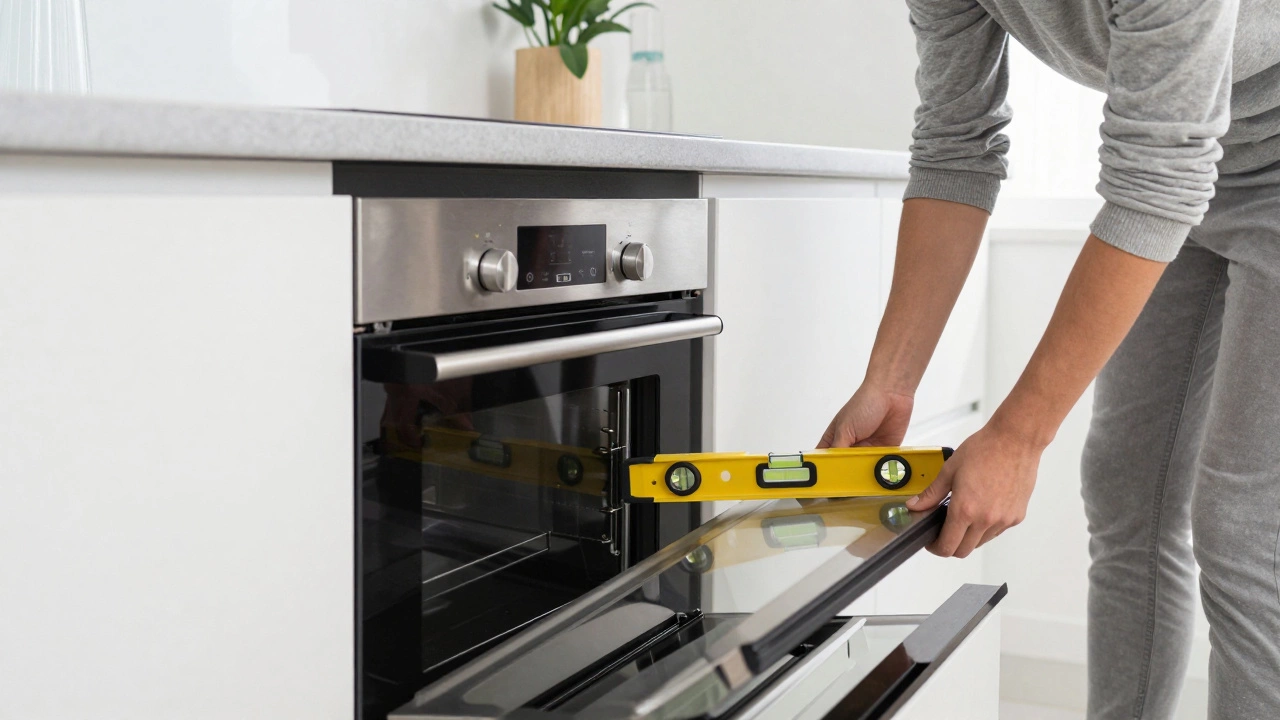
| Level | Checking oven balance | Ensures cakes and pies bake evenly |
Common Pitfalls to Avoid
I've seen plenty of people think they've got this handled, only to realize they've made a critical error. The biggest mistake is over-tightening or under-tightening the terminal screws. If the screw is too loose, it creates resistance, which generates heat, and can eventually melt the terminal block. If you strip the screw, you're looking at a much bigger repair job.
Another common blunder is ignoring the leveling legs. Most people just slide the oven in and call it a day. However, if your oven isn't perfectly level, oil in your pans will pool on one side, and your food will cook unevenly. Spend five minutes twisting the adjustable feet at the bottom until your level shows a perfect center.
Finally, don't forget the anti-tip bracket. This is a small piece of metal that screws into the floor or wall to prevent the oven from tipping forward if a child opens the door and leans on it. It seems like a nuisance to install, but it's a mandatory safety feature that saves lives.
When to Stop and Call a Professional
There is a difference between "I can do this" and "I should do this." You should stop immediately and call a licensed electrician if you encounter any of the following:
- The wires coming out of your wall are charred, brittle, or blackened. This indicates a previous electrical failure or overheat.
- Your wall outlet is a 3-prong and your new oven is 4-prong, and you don't feel comfortable swapping the cord.
- The breaker keeps tripping immediately after you plug the new oven in. This could be a short circuit or a faulty breaker.
- The oven is significantly heavier than your previous one, and you don't have a way to move it without damaging your home.
Remember, replace electric oven projects can go from a simple swap to a full-house rewiring project very quickly if you ignore the warning signs. There's no shame in paying a pro to ensure the job is done to code.
Do I need a permit to replace my electric oven?
Generally, if you are simply replacing an existing appliance with a similar one using the existing wiring, you do not need a permit. However, if you are installing a new 240V circuit or upgrading your electrical panel to accommodate a more powerful oven, most local building codes require a permit and an inspection by a certified electrician.
Can I use a 3-prong cord on a 4-prong outlet?
No. You must use a cord that matches the outlet in your wall. A 4-prong outlet provides a dedicated ground wire for safety. Using an adapter or the wrong cord bypasses these safety features and increases the risk of electric shock or fire. Always buy the correct cord for your specific outlet type.
Why is my new oven not heating even though the lights are on?
This is common with 240V appliances. Your oven uses two separate 120V "legs" of power. If one breaker has tripped but the other hasn't, the oven will have enough power to run the clock and the lights, but not enough to power the heating elements. Check your breaker panel and flip the oven switch all the way off and then back on again.
How long does it usually take to replace an oven?
For a confident DIYer with a helper, the actual swap takes about 1 to 2 hours. This includes removing the old unit, installing the new power cord, and leveling the appliance. If you have to do some light cleaning or adjust the cabinetry, allow for a full afternoon.
Should I use a surge protector for my oven?
Standard power strips and surge protectors are designed for 120V electronics and cannot be used with a 240V electric oven. They would melt or explode instantly. If you want to protect your oven from power surges, you need a whole-home surge protector installed at your main electrical panel by a professional.
Next Steps and Troubleshooting
Once your oven is installed, don't just start baking a roast. Run a "burn-in" cycle. Most new ovens have a factory coating that needs to be burned off. Set the oven to a medium temperature for about 30 minutes. You might smell something like burning plastic or chemicals-that's normal. Keep your kitchen well-ventilated during this process.
If you notice the oven is wobbling, go back to the leveling legs. If the power cord feels hot to the touch after an hour of use, turn off the breaker immediately. This usually means the connections at the terminal block aren't tight enough, and you're dealing with electrical resistance that could lead to a fire.