The idea of living without hot water or heating, even for a day, freaks out most homeowners. If you’re wondering how long swapping out that old boiler will mess with your daily routine, you’re definitely not alone. The actual time it takes depends on a bunch of real-life stuff—your home setup, the state of your pipes, and even how tidy the area is where your boiler sits.
Let’s clear up a myth: some folks think it’s a simple 'in and out' job done in a morning. But in real houses, with random quirks, missing parts, or that surprise leak from ten years ago, things don’t always go to plan. On average, you’re looking at about one to three days. Most straightforward replacements can wrap up in a single day—if your new boiler’s a similar type and your old one didn’t cause too much chaos on its way out. But if you’re upgrading to a different system or moving the boiler location, prepare for more work (and extra cups of coffee).
- What Happens When You Replace a Boiler?
- Average Timeframes: Simple Switch vs. Total Upgrade
- What Can Delay Your Boiler Replacement?
- How to Speed Up the Process
- Tips for a Smooth Boiler Swap
- What Happens After Installation?
What Happens When You Replace a Boiler?
So, how does a boiler replacement actually play out in real life? It’s more than just pulling out the old and shoving in the new. There are clear steps, and knowing them can save you some serious stress.
First, the heating engineer will show up (hopefully on time) and take a last look at your current setup. If you have clutter or boxes nearby, moving them out of the way early can make things go smoother and faster.
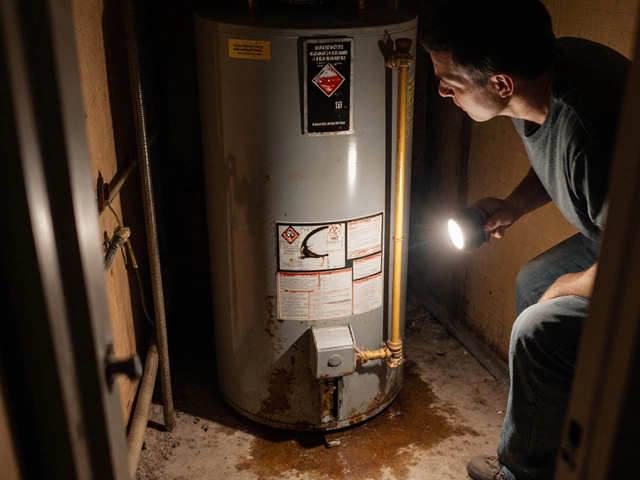
Next, the system gets safely shut off. The engineer drains out all the water from your old boiler and pipes to avoid any mess. Once that’s done, they disconnect the old unit, which can reveal crazy surprises—corroded pipes, odd DIY fixes from decades ago, or maybe a family of dust bunnies.
After that, the space where your new boiler will be fitted is cleaned up and checked for any issues. If you’re switching to a different type of system (like moving from a regular boiler to a combi), extra pipework or wiring comes into play. That can add hours, sometimes a whole extra day if your home is older or the pipe layout is awkward.
- Engineer inspects and preps the work area.
- Shut down and drain the old boiler.
- Disconnect and remove the old unit.
- Check/clean area and prep for new boiler.
- Install and connect the new boiler.
- Test the new boiler, bleed radiators, and restart the system.
Installation usually wraps up with a full safety check and handover. The engineer will show you the controls and give you paperwork (hang onto this for warranty). Don’t be shy—ask how to adjust the temperature, run a hot water boost, or spot common error codes. You’re paying for both the install and that know-how.
One more thing: a lot of pros now offer to dispose of your old boiler for you. It’s worth checking, since dragging it to the dump yourself is not anyone’s idea of fun.
Average Timeframes: Simple Switch vs. Total Upgrade
If you're just replacing an old boiler with a similar model in the same spot, you usually get the quickest turnaround. On average, a straight swap like this takes about 4 to 8 hours. That means the pros can often be in and out the same day, and you’re back to hot showers before dinner. This is the ideal scenario—no rerouting pipes, the flue stays in the same spot, and the wiring matches up.
But here’s where things can get tricky: if you’re switching from, say, a regular boiler to a combi, or you want to move the location (like from a kitchen to the loft), you’re in for more work. Full upgrades or changing the system type can easily stretch to 2 or even 3 days. Why? Stuff gets complicated—pipes and water tanks might need moving, extra safety checks pop up, and sometimes the installer will uncover hidden surprises, like rotten floorboards or outdated wiring.
- Boiler replacement (same type, same spot): usually 1 day (4-8 hours)
- System change (e.g., regular to combi): 2-3 days
- Boiler relocation: add about one extra day to the job
Here’s a quick breakdown so you know what to expect:
| Replacement Type | Estimated Time |
|---|---|
| Like-for-like swap | 4-8 hours (1 day) |
| System upgrade (e.g. regular to combi) | 2-3 days |
| Moving boiler location | Add 1 extra day |
Here’s one thing folks forget—sometimes the job isn’t just about connecting wires and pipes. If your home’s heating system is ancient, the installer might recommend flushing it out or updating some radiators. That can bump the timeline by a few extra hours, but it’s worth it to avoid issues down the road.
If you really want things to move fast, book your install for early morning and make sure the area is clear. When I had to replace my parents' boiler, just moving some boxes out of the way shaved an hour off the job. That’s a free tip you can use right now.
What Can Delay Your Boiler Replacement?
Boiler replacement isn’t usually a one-size-fits-all job. People are often caught off guard by things that drag out the process. Want a real timeline? Let’s be honest about what can slow you down.
- Boiler replacement location: If your new boiler is going exactly where your old one sits, things move quicker. But if you’re moving it upstairs, switching from kitchen to garage, or tucking it in a crazy small space, expect extra hours or even an extra day.
- Old or weird pipework: Have a house built before the 1980s? You could be dealing with pipes that don’t play nice with modern boilers. Rusty or awkward pipe layouts often surprise installers and mean extra plumbing time.
- Switching boiler types: Changing from a regular boiler to a combi or a system model? It’s a much bigger project. This means extra labor, often rewiring, and sometimes even new water tanks getting fitted or pulled out.
- Parts missing or damaged: It sounds basic, but sometimes suppliers show up late or deliver the wrong piece. Or the installer finds an unexpected problem inside your old boiler. Either way, you’re stuck until the right replacement part turns up.
- Access issues: If the boiler or the pipes are hiding behind fitted cupboards or sealed walls, someone has to get that stuff out of the way. That means more time—and sometimes more mess.
If your house has an old heating system, it’s also possible to find asbestos lagging or insulation. This can’t just be ignored. Getting rid of asbestos safely is a specialist job. You might be staring at a week of delay if that comes up, and UK law is extra strict here.
Here’s a quick snapshot of the most common delay factors and how much extra time they usually add:
| Delay Factor | Extra Time Added |
|---|---|
| Switching to a new boiler type | +1 to 2 days |
| Relocating boiler | +0.5 to 1 day |
| Old or problematic pipework | +0.5 to 2 days |
| Parts delivery issues | Varies – can be hours to weeks |
| Asbestos found | +1 to 7 days |
The best way to avoid hidden delays? Have a chat with your installer before work starts and make sure they take a proper look at your setup first. Surprises kill the schedule more than anything else.

How to Speed Up the Process
No one wants to be stuck shivering while waiting for a new boiler. A little prep goes a long way here. When you know exactly what to expect, you can help the installer move fast and avoid unnecessary setbacks. Here’s what really makes a difference:
- Boiler replacement starts smoother when you clear access. Move boxes, coat racks, or laundry baskets out of the way. If you’ve got kids or pets, keeping them out of the boiler room saves time and makes things safer.
- Have all your paperwork ready. That means your boiler model, any service notes, and your own questions. Trust me, you don’t want the installer guessing what system you have. If you’re switching fuel types (like from gas to electric), give the installer a heads-up—those jobs need extra planning.
- Know if your home needs extra electrical or gas work. Some old places need new wiring or pipe checks. Tackling this ahead of time lets your installer focus on swapping boilers, not playing detective with your utilities.
- Plan for deliveries. If your new system needs parts or extras like radiators or smart controls, make sure they arrive before installation day. Nothing holds up a job like a missing part. Ask your HVAC company to double-check supplies before showing up.
Here’s a quick table with rough time savings—these aren’t magic numbers but real-world improvements:
| Preparation Step | Time Saved |
|---|---|
| Clear access to boiler area | Up to 1 hour |
| All paperwork and specs ready | 30–45 minutes |
| Discussing utility needs before install | Up to 2 hours |
| All needed parts onsite | Up to half a day |
If you want to go the extra mile, chat with your installer a few days before and ask if they might need anything else from you. A short call can save hours of hassle. Everyone’s happier when things run on schedule.
Tips for a Smooth Boiler Swap
No one wants to drag out a boiler replacement longer than needed. A few easy steps and some basic prep work can cut headaches and keep that boiler replacement on track. Even little things make a big difference when the installers show up.
- Clear the area: Move boxes, shoes, and anything else out of the way. Installers need space for tools and the big, heavy boiler. Bonus tip: be kind to your floors and put down some old sheets or cardboard.
- Check your water: If your system is old, know where you can shut off the water quickly. Sometimes installers need access, and having the main shutoff clear saves time.
- Ask about permits: Boiler swaps often need permits, depending on where you live. Ask your installer if you need anything from the city. Better safe than sorry, and it avoids last-minute delays.
- Pin down your schedule: Someone 18 or older usually has to be home. If you or your partner work odd hours, plan ahead instead of canceling last minute.
- Keep kids and pets away: Not just for safety, but for everyone’s sanity. My daughter Sidney once tried to “help” with a wrench. Fun for her, not so great for the timeline.
- Ask for a written timeline: Get a basic schedule in writing. That way you can call out anything that seems off and make plans if hot water goes missing longer than promised.
Here’s what usually speeds up and slows down a typical swap—the stuff most folks actually care about:
| Factor | Speed Up | Slow Down |
|---|---|---|
| Type of Replacement | Like-for-like (same model and size) | Switching systems (combi to system, etc.) |
| Pipework | Existing pipes in great shape | Pipes need repair or replacement |
| Location | New boiler in the same spot | Relocating to a different spot in the house |
| Permits/Inspections | All paperwork ready ahead of time | Waiting for approval after work starts |
| Access | Boiler is fully accessible | Blocked or cluttered area |
The best installers will tell you what to expect up front, but don’t be afraid to ask for more details if anything’s fuzzy. Setting things up right from the start usually means you’ll have your heat and hot water back way faster than you expect.
What Happens After Installation?
Once the new boiler is in and the tools are packed away, the job isn’t quite over. The first thing your installer will do is test the system to make sure everything works as it should. Don’t be surprised if they run your hot water tap, check the radiators, and give each pipe a good look-over. Any weird noises or unexpected cold spots? They’ll want to sort that out before heading out the door.
The next big step is the handover. A decent installer won’t just pat the boiler and say "all done." They’ll walk you through the new controls, show you how to set timers, and explain any quirks. Most modern boilers are pretty straightforward, but if you’re jumping from a decades-old dinosaur to a high-efficiency model, the difference can be wild. You should get all the paperwork, including warranty info, the installation certificate, and a record for your home insurance.
By law in the UK, a Gas Safe engineer must register the new boiler with the manufacturer and usually with the local council or authority. This isn’t just red tape: it keeps your warranty valid and your home safe. If you ever sell your place, you’ll need this document to prove the job was done right.
It’s smart to check for any hiccups right away. Set the thermostat, try the hot water, see how the system feels. Problems like pressure drops or error codes sometimes pop up in the first week, so don’t ignore them. Jot down any questions and get your installer’s contact info in case you need follow-up help.
To keep your boiler replacement running smooth, book an annual service. Many warranties actually require this. Regular checkups spot issues before they empty your wallet or flood your kitchen. Here’s a quick table to see what typically happens post-install:
| Post-Installation Task | Timeframe | Who Handles It? |
|---|---|---|
| System test & sign-off | Immediately after install | Installer |
| Register boiler/warranty | Within 24-48 hours | Installer |
| User demo & paperwork | Day of install | Installer |
| First user check (thermostat, water) | First week | Homeowner |
| Annual service booking | Within 12 months | Homeowner |
If you’ve got kids or housemates, warn them about any settings changes and encourage everyone to report weird boiler behavior. A bit of vigilance now can save a total headache later. After a week or so, once you’re confident everything’s working, you’ll wonder why you put it off so long. Trust me, nobody in my house misses the old clunky boiler that rattled every winter.