So, you've noticed your oven isn't performing like it used to. Dinner's coming out unevenly cooked, or perhaps there's no heat at all. Sounds familiar? These could be signs that your electric oven element is on its way out. But how can you be sure? Let's break it down.
First off, a visual inspection is a good start. If you see any burns or breaks on the element, that's a clear red flag. Still not convinced? When you turn on the oven, does the element glow? It should get bright red. A dull or unlit element while the oven's on usually screams 'trouble'.
Sometimes, the element might even decide to trip the circuit breaker. That's another not-so-obvious indicator. Weird smells or odd noises? They often signal an electrical fault.
Recognizing Warning Signs
So, your trusty electric oven isn't cooking up a storm like it used to. It might be just a hiccup, or more likely, a sign that your electric oven element is saying its final goodbye. Let's talk about what you should watch for.
Visual Clues
A bad heating element often leaves some visual breadcrumbs. Check if the element has any visible signs of damage like blistering or cracks. This could be your first clue that something's off.
Lack of Even Heat
Ever notice your roasted veggies half-charred and half-raw? Uneven heat is a classic symptom. If you're not getting a consistently warm oven, the heating element could be failing.
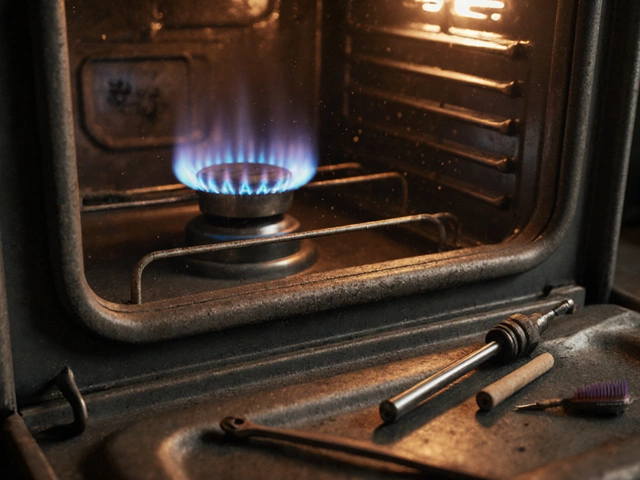
Element Not Glowing
When you switch on the oven, the elements should glow brightly. If yours stays dark or becomes only slightly red, it's time to consider a replacement.
A technician from OvenFix Pro once said, "A well-functioning element is like a reliable friend, glowing bright and steady every time you need it."
Noise and Odor
Strange buzzing noises or off-putting odors are your nose and ears telling you the electrical system might be malfunctioning.
If any of these signs are cropping up, it might be time to look closer at the oven repair options and possibly replace the suspect element.
The Impact on Cooking
A bad electric oven element doesn't just mean your oven's busted. It messes with your food too. Imagine popping a cake in the oven, expecting a fluffy delight, and ending up with a dense brick. Disappointing, right? That's because uneven heating can totally wreck your cooking game.
When an electric oven element fails, it usually results in uneven cooking. One part of your dish might be overcooked, while another stays raw. This is especially troublesome if you're keen on precise baking where even heat is key.
Danger of Cold Spots
Cold spots are more than a minor annoyance. They can actually slow down cooking, meaning you have to keep dishes in the oven longer. Not only does this waste time, but it can also dry out or spoil your meals.
"Inconsistent oven temperatures can lead to a 30% increase in overcooked meals," notes Jamie Thomason, a renowned kitchen appliance expert.
And the hits keep on coming! Left unchecked, a bad element can overwork your oven. This could potentially lead to more costly repairs down the line.
Cooking Tips with a Faulty Oven
- Shift dishes midway to ensure even cooking.
- Use an oven thermometer to monitor actual temperature.
- Opt for recipes forgiving of temperature shifts.
Considering all this, it's worth regularly checking your oven's element to maintain the quality of your meals. Plus, catching issues early saves you from future headaches with your faulty oven.

Testing the Element
Wondering how to test your electric oven element? It's not as daunting as it sounds. You'll need a multimeter for this job. If you don't have one, you can snag one at most hardware stores—they're affordable and super handy!
Get Ready
Before anything, safety first. Ensure your oven is unplugged from the mains. You don't want any electrifying surprises! If it's a built-in unit, you may have to cut the power from the main breaker panel.
Access the Element
First, remove the oven racks to get a clear view. Unscrew the brackets holding the element in place—usually a couple of screws. Now, gently pull the element towards you. You'll see two wires connected to it at the back.
Using the Multimeter
Set your multimeter to the ohms setting. Now, place one probe on one of the element's terminals and the other probe on the second terminal. You're looking for a reading between 10 and 40 ohms, which means the element's likely still good. A reading of zero ohms or showing infinite resistance? Yep, the element's toast, bad news!
Extra Steps
- If there's no multimeter available, you can visually inspect the element's surface. Look for obvious signs like bubbles or breaks. But remember, appearances can sometimes deceive.
- When in doubt, calling in a pro might save time and hassle in the long run.
Regular checks can help avoid unexpected surprises, keeping your meals cooking smoothly in your trusty oven.
Replacement Steps
So, your electric oven element is definitely faulty, and you're ready to roll up your sleeves. Replacing it might sound intimidating, but trust me, it's simpler than you think. Just follow these steps.
Preparation and Safety
First, always prioritize safety. Before you do anything, disconnect the oven from the power source. Hey, nobody wants to deal with electric shocks, right?
Removing the Bad Element
- Locate screws securing the element to the oven wall. These are usually found at the back. Don't worry; you won't need a degree in engineering to spot them.
- Remove those screws using a screwdriver. Set them aside to ensure you don't lose them. Trust me, it's easier to do this now than try to find replacements later.
- Carefully pull the element forward. Gentle does it; the wires attached at the back are fragile.
- Detach the wires by slipping them off the element's terminals. A needle-nose plier might come in handy here.
According to Bob Vila, a home improvement expert, "Replacing an oven element is a straightforward task that, with care, can be done by even a beginner DIYer."
Installing the New Element
- Take your shiny new element and attach the wires to the terminals. Make sure they're snug – loose connections can cause troubles later.
- Reposition the element, aligning it with the screw holes in the oven wall.
- Screw the element back into place. Remember those screws you kept safe? Now's their time to shine.
- Reconnect the oven to the power and give it a test run. Check for even heating and a nice, consistent glow.
Remember, if you're ever feeling unsure, there's no harm in calling a professional. But with these instructions, it's entirely possible to do it yourself and have your oven running smoothly again!