That moment when the dishes come out crusty or, worse, the kitchen floor starts to puddle—nobody has time for dishwasher drama. Figuring out whether you should fix what you’ve got or just spring for a new machine can be tricky. Truth is, most people miss the warning signs early and end up feeling stuck when things get worse.
Here’s a quick heads-up: odd noises, dishes that won’t dry, water that sticks around in the bottom, or the smell of something burning mean your dishwasher is already screaming for attention. Sticking to simple checks, like seeing if the spray arms are clogged, the filter is gross, or if the door seals are grimy, can solve a lot of headaches without spending a dime. But if these little tweaks don’t help, your machine might be telling you it needs more than just a wipe-down.
- Spotting the Warning Signs
- Common Dishwasher Issues and DIY Fixes
- When a Repair Makes Sense
- Signs It’s Time to Replace
- Cost Comparison: Repair vs Replace
- Keeping Your Dishwasher Running Longer
Spotting the Warning Signs
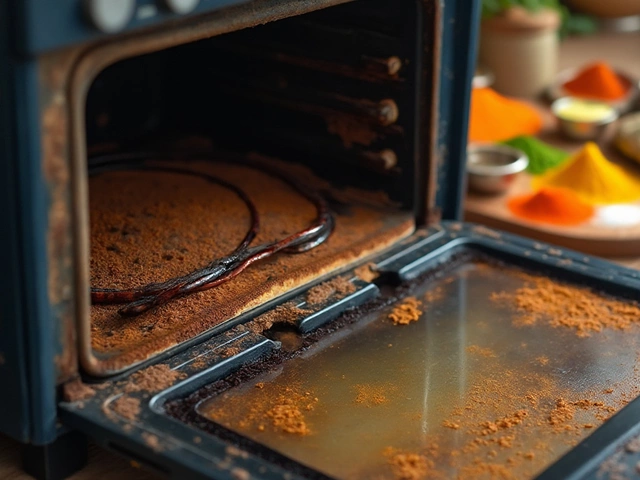
Your dishwasher can’t talk, but it throws out clear hints when something’s up. The faster you spot the issue, the better shot you have at saving time, hassle, and money. Notice your dishes coming out with bits still stuck on? Maybe water isn’t pumping out like it used to? These are early warning flags you should never ignore.
Look out for these signs:
- Strange noises—like grinding, thumping, or high-pitched squeals
- Dishes staying dirty even after a full cycle
- Puddles or leaks on the kitchen floor
- Standing water left inside after it finishes
- Burning smells or regular electrical trips
- The door doesn’t latch or seal properly
- Rust anywhere inside or on wiring
- Building up white residue or cloudy glassware
If you’re dealing with more than one of these at once, chances are the problem is bigger than just a quick clean. One survey from 2024 showed that dishwashers aged 9 years or older were 3 times more likely to develop these symptoms in clusters, especially leaks and poor cleaning.
| Warning Sign | Possible Cause | What It Means |
|---|---|---|
| Water left in bottom | Clogged filter or drain hose | Needs cleaning or repair |
| Strange sounds | Broken pump or stuck debris | Mechanical parts wearing out |
| Leaky door | Worn door gasket | Seal may need replacing |
| Burning smell | Electrical issue or faulty motor | Get professional help now |
| Cloudy dishes | Hard water or poor rinse | Rinse aid or filter issue |
You don’t have to be an engineer to catch these cues. Doing a simple look-and-listen check every month helps you catch small stuff before it turns into an expensive headache. Give your dishwasher a once-over while you’re putting in or taking out dishes—just a few seconds every time can make a real difference.
If these warning signs keep popping up, your appliance might need more than a DIY fix—or it could be reaching the end of its working life. The next sections will get into what you can do on your own before calling in the pros or shopping for a new one.
Common Dishwasher Issues and DIY Fixes
Not every dishwasher failure means you need to buy a new one. Most times, the problems are common and easy to fix yourself, saving you time and cash. If your dishwasher starts acting up, check these issues first—some of them are surprisingly simple to sort out before considering professional dishwasher repair.
- Problem: Dishes aren’t coming out clean.
DIY Fix: Pull out and scrub the spray arms with warm soapy water and a toothpick to clear clogged holes. Don’t forget to rinse out the filter at the bottom—gunk builds up fast and affects washing. - Problem: Water won’t drain from the bottom.
DIY Fix: First, check the drain filter for food scraps or debris. If it’s all clear, look at the drain hose (the tube in the back). Make sure it’s not kinked or blocked, and see if it’s pushing water out during the cycle. - Problem: Dishwasher smells bad.
DIY Fix: Bad smells point to hidden food. Take out the filter and wash it, wipe down the inside door seals, and run a cycle with a cup of vinegar on the top rack. - Problem: Machine makes strange noises.
DIY Fix: Rattling usually means an item is loose inside, like a spoon in the bottom rack. Grinding could mean something is stuck in the pump. Pop out the lower rack and check for any stray items or debris. - Problem: Water leaking onto the floor.
DIY Fix: Leaks often come from a loose or dirty door gasket. Wipe the gasket, make sure nothing is in the way of the door closing, and see if the latch is working. If the gasket looks cracked, you can find replacements online or at a hardware store.
Here’s a quick look at how often these problems show up and the typical DIY success rate:
| Issue | % of Cases | DIY Fix Success Rate |
|---|---|---|
| Dirty Dishes | 35% | 80% |
| Won’t Drain | 22% | 70% |
| Bad Smells | 18% | 85% |
| Noisy Dishwasher | 15% | 60% |
| Leaking | 10% | 50% |
Keep a regular habit of cleaning filters and spray arms every month. Spotting and fixing these simple issues goes a long way toward making sure your dishwasher doesn’t quit on you too soon. If these steps don’t work, though, it might be time to dig deeper or call in a pro.
When a Repair Makes Sense
So, when is it smart to fix your dishwasher instead of tossing it? The answer usually comes down to the age of your machine, what’s wrong with it, and how much the fix will set you back.
Most dishwashers are designed to last about 9-10 years. If yours is under seven years old and hasn’t been giving you constant trouble, repairs make a lot of sense—especially if it’s a moderately priced model or higher. Problems like clogged spray arms, a busted latch, or a jammed drain pump are usually quick and cheap to fix. Replacing a heating element or float switch? That’s usually way less than half the cost of a new machine.
"If your dishwasher is less than halfway through its expected lifespan and repair costs are under 50% of the price of a new unit, a repair is generally your best bet." — Consumer Reports, 2024
Here’s a quick breakdown of typical repair costs versus replacement:
| Common Repair | Average Cost (USD) | Time to Fix |
|---|---|---|
| Replace door seal | $80 - $150 | 30 min — 1 hr |
| Unclog drain or spray arm | $100 - $200 | 1 hr max |
| Heating element | $150 - $250 | 1-2 hrs |
| Control board | $200 - $400 | 1-2 hrs |
If your problem matches anything above and you’re not dealing with an ancient dishwasher, it’s usually a straightforward fix. Here are some cases where you should definitely lean toward dishwasher repair instead of replacement:
- The machine is less than seven years old, well under its expected life span.
- No history of major issues or recurring breakdowns.
- The repair cost is lower than half of buying a new dishwasher.
- It’s a reliable brand or a high-end model that’s pricey to replace.
One last tip: check your warranty. Lots of newer dishwashers have decent parts warranties that might cover the fix. It never hurts to check before you pay out of pocket.

Signs It’s Time to Replace
Sometimes repairing your dishwasher is just throwing cash out the window. Knowing when to stop fixing and start shopping for a new one can save you a lot of frustration. Here’s the rundown on clear signs your dishwasher is done for.
- Age: Most dishwashers last about 8 to 12 years with regular use. If yours is pushing (or over) the 10-year mark and giving you headaches, replacement probably makes sense.
- Costly Repairs: If a repair bill is 50% or more of what a new machine costs, that’s a huge red flag. Why pour money into something close to retirement?
- Poor Performance: When dishes are coming out dirty, spotty, or still wet after running a full cycle—especially after you’ve cleaned the filter and spray arms—the guts of the appliance are likely wearing down for good.
- Leaks and Cracks: If the tub or inside parts have large cracks, leaks, or rust, fixing isn’t really an option—these issues just get worse over time.
- Noisy Operation: Loud grinding or banging might mean your motor or pump is on its last legs. If it sounds like a rock tumbler, it’s probably time to replace.
- Outdated Features or Efficiency: Older dishwashers usually use more water and electricity. Newer models are way more efficient and can save you on utility bills. If your unit’s a power hog, upgrading just makes sense.
Check out a quick comparison of repair and replacement costs just to see how things shake out:
| Issue | Average Repair Cost (USD) | Cost of Mid-Range New Dishwasher (USD) |
|---|---|---|
| Pump or Motor Replacement | $250 - $400 | $500 - $900 |
| Control Panel Replacement | $200 - $350 | $500 - $900 |
| Water Leak Repair | $150 - $300 | $500 - $900 |
| Multiple Problems | $400+ | $500 - $900 |
If you’re seeing more than one issue or the numbers start getting close, don’t sink more money into an old machine. New models also often include quieter cycles, better energy ratings, and improved cleaning—all worth thinking about. If you catch yourself fixing something every other month, that’s your cue: start scouting for a replacement.
Cost Comparison: Repair vs Replace
If your dishwasher isn’t getting the job done, you’re probably wondering if fixing it is just throwing money away. Average repair costs for dishwashers in the U.S. land between $150 and $350. That covers things like new pumps, thermostats, and minor electrical fixes. Meanwhile, buying a brand-new dishwasher can hit anywhere from $400 for a no-frills model to $1,200 if you want all the bells and whistles.
Let’s lay it out with real numbers so it’s crystal clear:
| Option | Typical Cost (USD) | What’s Included |
|---|---|---|
| Basic Repair | $150 - $300 | Pump/Motor, Door Seal, Sensors |
| Major Repair | $300 - $500 | Control Board, Heater, Full Pump Assembly |
| New Dishwasher (Budget) | $400 - $700 | Standard Features, Basic Cycles |
| New Dishwasher (Premium) | $800 - $1,200+ | Energy Star, Smart Features, Quiet Performance |
Now, here’s the deal: if your repair bill creeps past half the price of a new machine, the smart move is usually to replace it. Older dishwashers also eat more water and energy, so your utility bills might drop with a newer model. The National Association of Home Builders agrees, saying,
“Appliances like dishwashers have an expected lifespan of about nine years—repairs after that could be money down the drain.”
This means if your machine is older than eight or nine years and the fix is expensive, don’t get sentimental—upgrading can save money in the long run. Here’s a handy rule of thumb people in the dishwasher repair game use:
- If the dishwasher is under five years old and the repair’s under $300, fix it.
- If it’s over seven to eight years and repairs are stacking up, replace it.
Also, keep in mind those hidden costs—like lost time, repeat repairs, and extra energy use. Factoring everything in makes the decision easier, and your wallet (and sanity) will thank you.
Keeping Your Dishwasher Running Longer
Getting the most years out of your dishwasher is all about the basics. You don't need to be an appliance wizard—just a little regular routine goes a long way. The average dishwasher can last 9 to 12 years, but sloppy care can cut that in half.
First up, scrape (don’t rinse) your dishes. Modern machines are built to handle a little food, but chunks and peels get stuck in the filter and spray arms, making everything less effective. Once a week, pop out the filter under the bottom rack, soak it in hot water, and scrub off the slimy stuff. A dirty filter is the number one reason for stinky smells and cloudy dishes.
If you notice a white film on your glasses, you probably have hard water. Use a dishwasher cleaner or run an empty cycle with a cup of vinegar every month. It keeps the insides fresh and prevents mineral buildup.
The door seal (the rubbery ring that keeps water inside) should get wiped down every couple weeks too. Use a damp towel or old toothbrush. Food gunk or mold here means leaks later.
- Load dishes so water can spray everywhere—don’t cram too much in.
- Run hot water in your sink before you hit start, so the dishwasher fills with hot water right away.
- Check for old, cracking hoses and replace them before they burst.
- Keep the spray arms spinning free and unclog any tiny holes with a toothpick.
Every once in a while, let your dishwasher air out with the door slightly open. This keeps mildew from sneaking in.
Here’s a quick reference chart to keep track of what you should be doing and how often. These basics really stack up over time.
| Task | How Often |
|---|---|
| Clean filter | Weekly |
| Wipe door seal | Every 2 weeks |
| Run cleaning cycle (with vinegar or cleaner) | Monthly |
| Inspect hoses and spray arms | Every 6 months |
| Leave door ajar to air out | After heavy use |
If you work these habits into your routine, you’ll help your dishwasher repair bills stay low and could squeeze out a few extra years before you need to start shopping for a new one.