So, you've noticed something's not quite right with your electric hob—yep, the smell of burning isn’t a normal kitchen fragrance. Don’t fret! Fixing a burnt hob isn't as scary as it sounds, and you might not even need a professional for this. Let's break it down into some manageable steps.
First off, figuring out what exactly went wrong is key. Is it a surface burn, or is something more sinister happening underneath? Take a good look: if it's just a burnt spill, you might be in luck. But if the heat seems off or your hob's giving up halfway through dinner, there's definitely more digging to do.
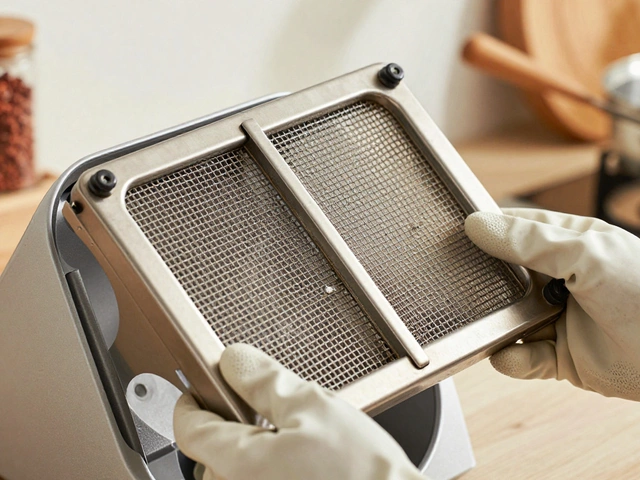
Now, before rolling up your sleeves, it's essential to arm yourself with the right tools. A simple screwdriver, some baking soda for cleaning, and a replacement fuse (just in case) could all come in handy. Nothing too fancy—just the basics to ensure you’re ready for whatever the hob throws your way.
- Identifying the Burnt Problem
- Gathering Essential Tools
- Effective Cleaning Techniques
- Troubleshooting Faulty Components
- Maintenance Tips to Avoid Future Burnouts
Identifying the Burnt Problem
Before jumping headfirst into fixing that burnt electric hob, you gotta figure out why it’s acting up. The goal here isn’t to become a hob whisperer overnight, but knowing what to look for can really save you some hassle down the road.
Start by taking note of any visible damage. Look at the hob’s surface—are there scorch marks, burnt-on spills, or discolored spots? Sometimes it's as simple as a cleaning issue if these marks don’t come off with standard cleaning methods, it might just be stubborn residue.
If the surface seems fine, but your hob still isn’t working right, delve deeper. Listen for strange sounds—buzzing or crackling noises? That's not normal. Also, feel out for unusual heat distribution. If one zone heats up way quicker (or slower) than others, there might be a more technical issue at play.
A couple of things could be causing these hiccups. It could be a faulty heating element, which is often the culprit when things run cold. In electric hobs, a blown fuse can cause sections to stop working entirely. A handy way to check is flipping the circuit breaker off and on to see if that resets the problem.
- Surface Burns: Visible discoloration usually caused by high temperatures and spillovers.
- Uneven Cooking: Parts of the hob heat erratically, sometimes due to faulty elements.
- Strange Noises: Buzzing or crackling could signify wiring or connection issues.
- Power Issues: Some zones not working might need a fuse replacement or circuit reset.
Identifying the issue accurately sets the stage for a targeted fix. This way, you won’t waste time—and maybe even money—fixing what’s not broken. So, a bit of hob detective work goes a long way.
Gathering Essential Tools
Alright, let's get you prepped and ready with the basics you'll need to tackle that burnt electric hob. You don't need to yawn through an entire toolbox—just gather a few key items that'll make your life way easier.
First, a standard screwdriver is your sidekick here. Electric hob screws can be sneaky and tightly fitted, so a screwdriver helps you pop things open without a fuss.
Next, keep some baking soda handy. It's not just for cookies—when mixed with a little water, it forms a magical paste that scrubs away stubborn burnt stains like a charm.
You might also want a replacement fuse—it’s a common hiccup when dealing with electrical appliances and could save a trip to the store mid-fix.
For safety, have a pair of rubber gloves to protect your hands while cleaning and a multimeter to test any suspicious electrical connections. Use it to check if the current's flowing where it should—it’s easy to use and super handy for troubleshooting.
- Screwdriver: Basic, but essential for opening up the hob.
- Baking Soda: Mix with water to tackle stubborn stains.
- Replacement Fuse: In case the issue is a simple fuse blowout.
- Rubber Gloves: Keep your hands safe from chemicals and sharp bits.
- Multimeter: Handy tool to check electrical connections.
With these in your corner, you're setting yourself up nicely to not just repair but maybe even impress yourself with your newfound hob-fixing skills.

Effective Cleaning Techniques
Dealing with a burnt electric hob? Before we jump into deep repairs, a good cleaning can reveal whether it's just stubborn grime causing the issue or something more serious. Let's get you started on the best ways to clean that hob.
First, make sure your hob is completely cool before you even think of cleaning. Safety first!
When it comes to cleaning, don't underestimate the power of household ingredients. Mix some baking soda and water into a paste. This mixture is surprisingly effective for scrubbing away those annoying burnt spots.
Here's a simple way to get it done:
- Apply the paste to the burnt areas, making sure to cover them well.
- Let it sit for about 15-20 minutes. The paste works its magic by loosening up the burnt residue.
- Scrub gently with a non-abrasive sponge, tackling each trouble spot.
- Wipe clean with a damp cloth to remove any leftover baking soda.
If baking soda isn't doing the trick, you can try using a dedicated ceramic hob cleaner. These are designed to be tough on stains but gentle on the surface. Just follow the instructions on the package and remember to avoid anything too harsh that might scratch or damage your hob.
Avoid steel wool or scouring pads—they're a recipe for scratches and further damage.
As a quick tip, spillovers happen. To prevent them from turning into stubborn burns, wipe down your hob after each use. It's easier to maintain than to fix the aftermath!
Troubleshooting Faulty Components
When your electric hob repair skills are put to the test, troubleshooting faulty components is where the real detective work begins. Let's zero in on the common culprits that keep the heat away from your cooking adventures.
First, let's talk about the elements. These bad boys are responsible for heating up and can stop working due to wear and tear. If one burner isn't heating, and it's not a surface issue, the element might be busted. You can test it by swapping it with a working one, if your hob model allows that. Remember to turn off your hob at the main switch before playing around with the elements.
Then there's the issue of burnt electric hob fuses. A fuse might blow if your hob is facing excessive power surges or it's just had enough of this world. Most hobs have a fuse holder beneath or at the back. Pop it open, and if the fuse is toast, replace it. Again, safety first—make sure everything's powered down before you begin.
Next up is the control switch, especially if you're dealing with an older model. Sometimes what appears to be a burnt hob is actually a faulty switch that's not communicating properly with the elements. You'll need a multimeter to test for continuity. If the switch isn't sending power, it needs replacing.
Speaking of communication, the internal wiring might be the unsung villain in your hob troubleshooting. Damaged or loose wires can interfere with the current flow. Visually inspect these connections, but don't poke around unless you're sure you can put them back together safely.
- Step 1: Disconnect the power.
- Step 2: Check and test the elements.
- Step 3: Inspect and replace the fuses if needed.
- Step 4: Test the control switches for faults.
- Step 5: Inspect for any wiring issues.
Always consult your manufacturer’s guide or a professional if you’re unsure. A little DIY can go a long way, but safety should always be your top priority.
Maintenance Tips to Avoid Future Burnouts
So, you’ve got your burnt electric hob back in action, but you’re probably wondering how to keep it from happening again. A little bit of preventive care can go a long way in making sure your hob stays in top shape. Let's get into some handy maintenance tips.
First things first, keep that hob clean. When cooking, spills are almost guaranteed, but leaving them to burn off isn’t doing your hob any favors. After the hob cools down, give it a wipe with some baking soda and a damp cloth. Baking soda acts as a mild abrasive without scratching the surface, perfect for everyday grime.
Next, watch those pan bases. Using warped or uneven-bottomed cookware can disrupt heat distribution and cause hot spots on the hob. Go for flat-bottomed pots and pans, and you’ll have yourself a more evenly cooked meal, plus a happier electric hob.
It helps to regularly check the elements and connections for any signs of damage. Loose connections or frayed wires can lead to inefficiency or even a dreaded burn. It’s good practice to get in there occasionally (with the power off!) to make sure everything’s snug and secure.
Try not to stress each element too much. If you’re cooking a meal with multiple pots, it might be tempting to crank them all up to maximum heat. Instead, balance the workload so that no single element needs to work overtime, reducing the risk of burnouts.
If you’re the kind to forget turning off your hob after cooking, consider setting a timer on your phone or using hobs with built-in timers. This could prevent overheating and reduce the risk of burning out your elements.
Finally, don't skimp on age. If your electric hob has been around for a while, it might be time to consider an upgrade. Older models can become less efficient over time, leading to more frequent issues. Investing in a new, energy-efficient model could save you both time and money in the long run.
- Keep it clean with everyday maintenance.
- Use flat-bottomed cookware.
- Regularly inspect elements and connections.
- Don't overload individual elements.
- Consider upgrading older models.
Following these tips can prolong the life of your electric hob and keep those burnt smells at bay. After all, who doesn't want a hassle-free cooking experience?